The Best Applications for RIM Molding: Where Low Pressure Delivers High Performance
When engineers face challenging part requirements—large housings, impact-resistant components, or...
A molded part is only as good as the way it goes together with everything around it. Engineers who nail the geometry but treat fastening as an afterthought end up with stripped bosses, cracked corners, or inserts that spin under torque. RIM gives you room to design these features in from the start, but the rules are specific, and they are not the same rules you would use for a thermoplastic part.
This is a practical guide to getting fastening and assembly features right in a RIM design.
The governing concern is read-through. A feature thicker than the surrounding wall pulls material as it cures and can leave a sink mark or blemish on the opposite show surface. RIM polyurethanes are far more forgiving here than thermoplastics, but the principle still holds. A common guideline is to keep the base of a rib at or below about three-quarters of the nominal wall thickness, and to space ribs no closer than one nominal wall apart. Bosses follow the same logic. Design them with a wall thickness that supports the fastener without creating a thick, sink-prone mass.
Sharp inside corners are the other common failure point. Radius the inner corners of ribs, bosses, and walls to at least 1/16 inch. That single move reduces stress concentration and helps the material flow cleanly, which avoids air entrapment and weak corners. Established RIM design references treat this as a baseline, not an optimization.
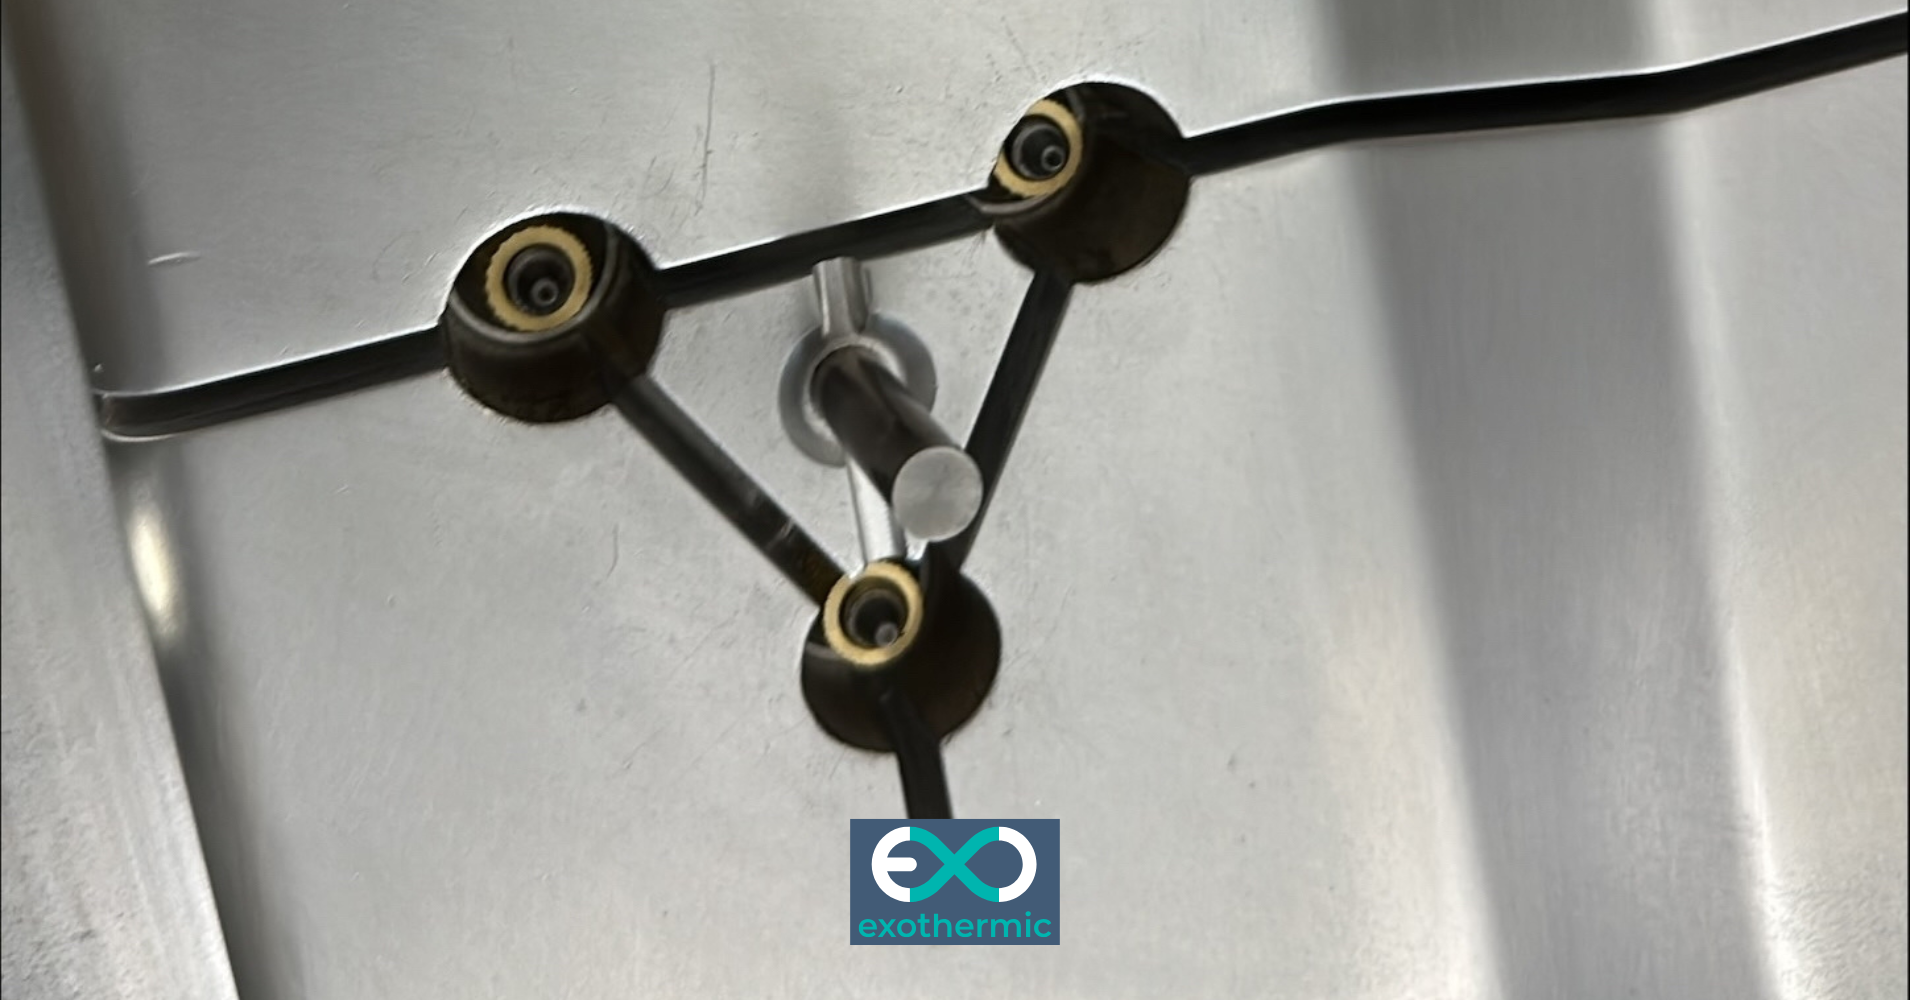
RIM offers an option thermoplastics cannot match. You can encapsulate hardware during the molding cycle. Threaded inserts, metal stiffeners, and brackets can be positioned in the tool and surrounded by material as it cures, which locks them in place and seals around them. When you mold an insert in, give it enough surrounding material to carry load. RIM design practice suggests a minimum wall around an insert of about 3/16 inch, and a minimum part wall of roughly 1/8 inch for solid systems or 1/4 inch for foamed systems where inserts are used. Those minimums keep the insert anchored and the surrounding section from cracking under service loads.
Where molding hardware in is not practical, inserts can be installed after molding, but designing the boss and wall correctly still governs whether the joint holds.

RIM's geometric freedom makes integrated features attractive. Snap fits, wire guides, and living-style hinges can be molded directly into a part. Undercuts that would demand complex sliding cores in injection molding are often achievable in RIM, though some still require side actions in the tool. The design question is always whether the feature can be drawn from the mold cleanly or whether it forces tooling complexity that erodes the cost advantage. Settle this early, because it changes both the tool and the part price.
When a design does call for more than one piece, RIM parts bond well with the right adhesive system, and mechanical fastening through molded bosses is reliable when the bosses are sized correctly. The better move, where it is feasible, is to avoid the joint entirely by consolidating the function into a single molding. Every joint you design out is a joint you never have to validate.
Design fastening features at the same time as the part geometry, not after. Size ribs and bosses against the nominal wall, radius every inside corner, give molded-in inserts enough surrounding material, and decide early whether undercuts justify their tooling. Get those four things right and the part assembles cleanly the first time.
It can if the boss is thicker than the surrounding wall. Keeping rib and boss bases at or below about three-quarters of the nominal wall, and radiusing inside corners, keeps read-through under control. RIM polyurethanes tolerate this better than thermoplastics.
Yes. Encapsulating inserts during molding anchors them and seals around them, provided you allow enough surrounding wall, on the order of 3/16 inch. Encapsulating inserts provide improved bond strength but at a slightly higher price.
Often, yes. Hand-loaded undercut details is unique to RIM and is a low-cost method for incorporating trapped details. RIM tolerates many undercuts that injection molding cannot, though some still need side actions. Settle this early because it affects both tool and part cost.
Before you finalize a print, it is worth a second set of eyes on the fastening strategy. Exothermic's engineers will review your bosses, inserts, and assembly features and flag issues while changes are still cheap. Reach out for an engineering consultation.
